
FAST Assistance is the process of managing assistance requests and queries. FAST allows requestors to log assistance requests in the event they require support. These assistance requests are categorised into topics and skill sets and then placed into a queue. FAST then enables responders to assign themselves the assistance requests in a timely and effective manner and assist the requestor. Once an assistance request is actioned, the responder will close the assistance request and have the ability to capture what happened in the request.
To create an assistance request, take the following steps:
- Click Assistance on the left navigation bar.

- Click Add New.

- Type out a message in the Requestor Message field if necessary.
- Select Assistance Type.

- Select Skill Set.

- Click Submit.

- Click Assistance on the side menu.
- Check My Assistance to see all your requests that are not finalised or are waiting for rating.

Column Description Action The actions associated with the assistance request. There are two actions you can perform: - Edit the assistance request
- View audit for the assistance request
Give a Rating This function allows you to rate the assistance you have received for your query. Request ID Unique identifier identifying the assistance request. Type Type of request; all assistance requests will have Assistance as type. Status The status of the assistance request. Message The message that the creator of the assistance request has typed. Created Date The date the assistance request was created. Accepted By The user who has accepted the assistance request. Latest Status The status of the assistance request. Task Age The age of the assistance request. Queue The queue number of the request within open active requests. - Check My Pending Assistance to see all active and open requests or requests you have assigned.

Column Description Request ID The unique ID of the request. Desk Where you can find the requestor of the assistance request. Assistance Type The type of assistance being requested. Location The location of the request. Skill Set The current skill set of the requestor. Team Manager The team manager of the requestor. Requested By The name of the person requesting the assistance. Created Date The created date and the date end time. Task Status The status of the assistance request. Task Age The age of the assistance request. Queue The queue number of the request within open active requests.
- Click Assistance in the left navigation bar. This will open the Assistance page.
This will open the Assistance page.
- Scroll down to the My Pending Assistance(s) table then select a request by clicking the Assign button.

Note: You can sort the assistance requests by Assistance Type, Location, and Skillset.
This will then assign the assistance request to you and navigate you to the Edit Assistance page for that request.
To accept and complete an assistance request, take the following steps:
- Click Assistance in the left navigation bar.
- Go to Assistance and find the task that you want to accept or process under My Pending Assistance(s) section. The status of the request should be "Open". This will put the task under your queue. Click the Assign button, this will open the Edit Assistance page.
- Enter a message in the Assignee Message box.

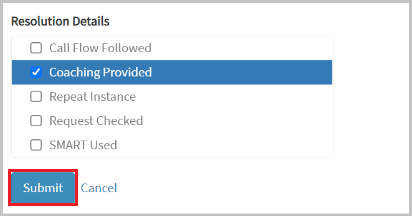
- Select Assistance Type, Skill Set, Topic, Resolution Details, and Complexity.

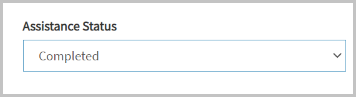
- Set the Assistance Status to Completed.
- Click the Submit button.
The assistance request is now completed.
Use this procedure to close an assistance request if it has been created in error. Once cancelled, an assistance request is deleted from the queue. This process may be performed by the CSR (Requestor) or by the Floorwalker (Responder).
- Navigate to Assistance on the left navigation menu.
- Locate the assistance request created in the My Assistance(s) section then click the Edit icon.

- Click the Request Status drop-down menu then select Closed.

- Click the Submit button.
A system message advising that the assistance has been successfully updated will appear. The request will also be removed from the queue.
To view the audit trail of the assistance request, take the following steps:
- Navigate to Assistance on the left navigation menu.
- Click the Audit icon.

- You can now see the audit log. It shows the history of the assistance request, such as who has updated it, time of update, etc. Click the Close button to exit the window.

NOTE: You can also access the Audit function on the Edit Request page.
- Navigate to Assistance on the left navigation menu.
- Select the stars under Give a Rating column.

To activate the audio notification, take the following steps:
- Log in to your FAST account.
- Click the Profile icon then Settings. This will open the Profile page.

- Click Audio Alerts.

- Turn the toggle to ON if you want to activate the sound of the Assistance module.

NOTE: You may select the Location, Skillset, and Assistance Type in which you want to activate the alert. The change is automatically changed.
If there is any request that matches the alert settings, a bell sound will play. The alert will sound every 30 seconds as long as the request matches the alert settings.